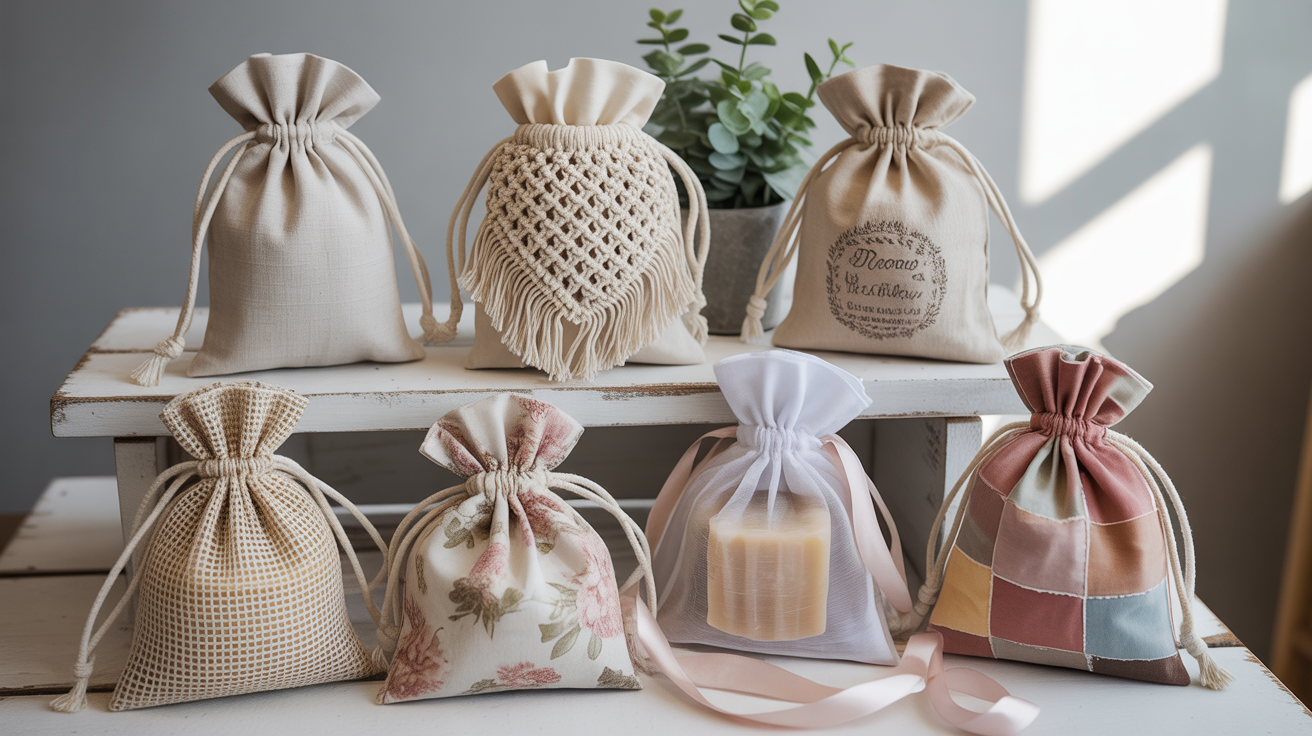
Hey loves! Can we talk about how awkward it feels handing someone a bar of soap in plain packaging? Like, you spent all that time picking out the perfect artisan soap, and then it just sits there looking… basic. I’ve been absolutely obsessed with creating gorgeous DIY soap gift bags that make even the simplest handmade soap look like it came from a luxury boutique. Today, I’m sharing my 7 favorite DIY soap gift bag ideas that are not only ridiculously easy to make but will have everyone asking where you bought them!
1. The Rustic Linen Drawstring Bag
Picture this: a natural oat-colored linen bag with raw, slightly frayed edges that screams “I’m effortlessly chic.” I’m talking about that beautiful texture that feels substantial in your hands—not too thin, not too thick. The key here is finding that mid-weight linen (about 6-8 oz) that has just enough body to stand up on its own. Cut your fabric into 6×8 inch rectangles, and don’t overthink the proportions—you want it snug enough to hug the soap but roomy enough to tie a cute bow at the top.
Shop the Look:
Dos & Don’ts:
- ✓ Do prewash your linen to get that perfectly soft, lived-in texture
- ✗ Don’t use synthetic fabrics—they won’t give you that rustic vibe
- ✓ Do add a wooden bead to your drawstring for that elevated touch
- ✗ Don’t make the bag too large or it’ll look sloppy and unfinished
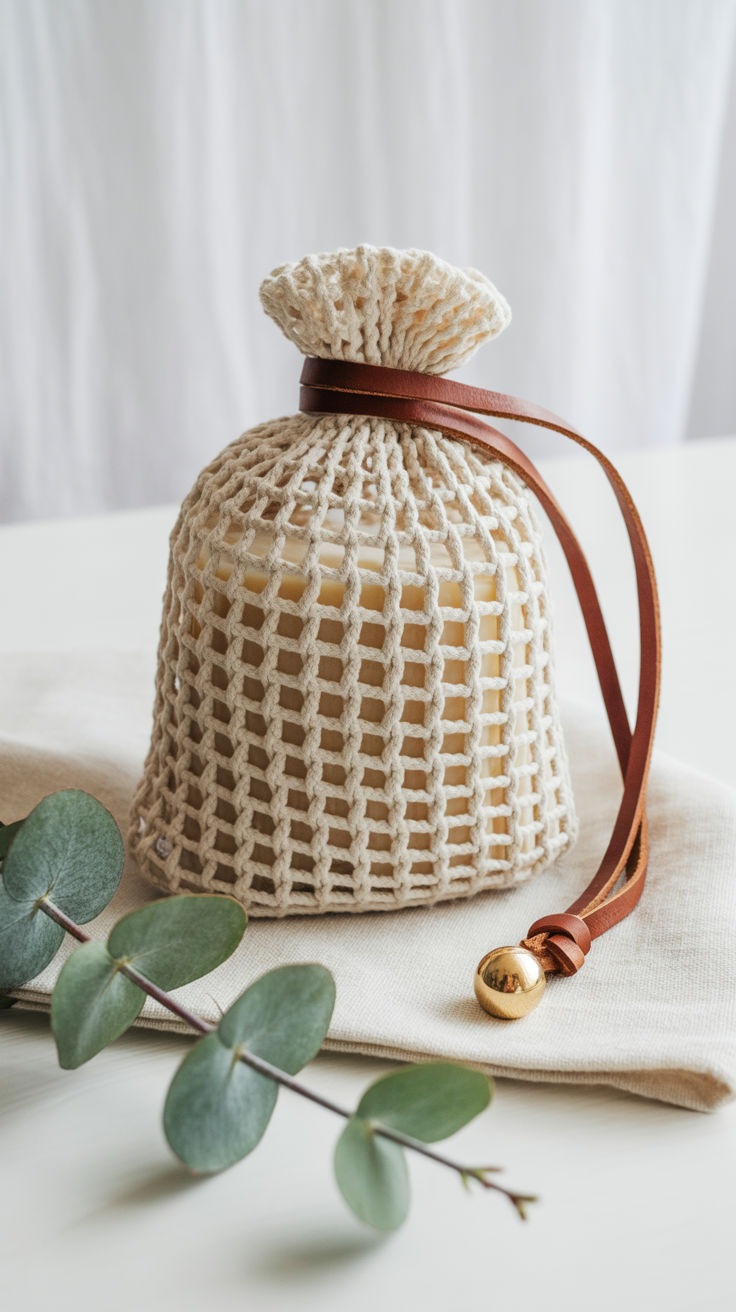
2. The Boho Macramé Holder
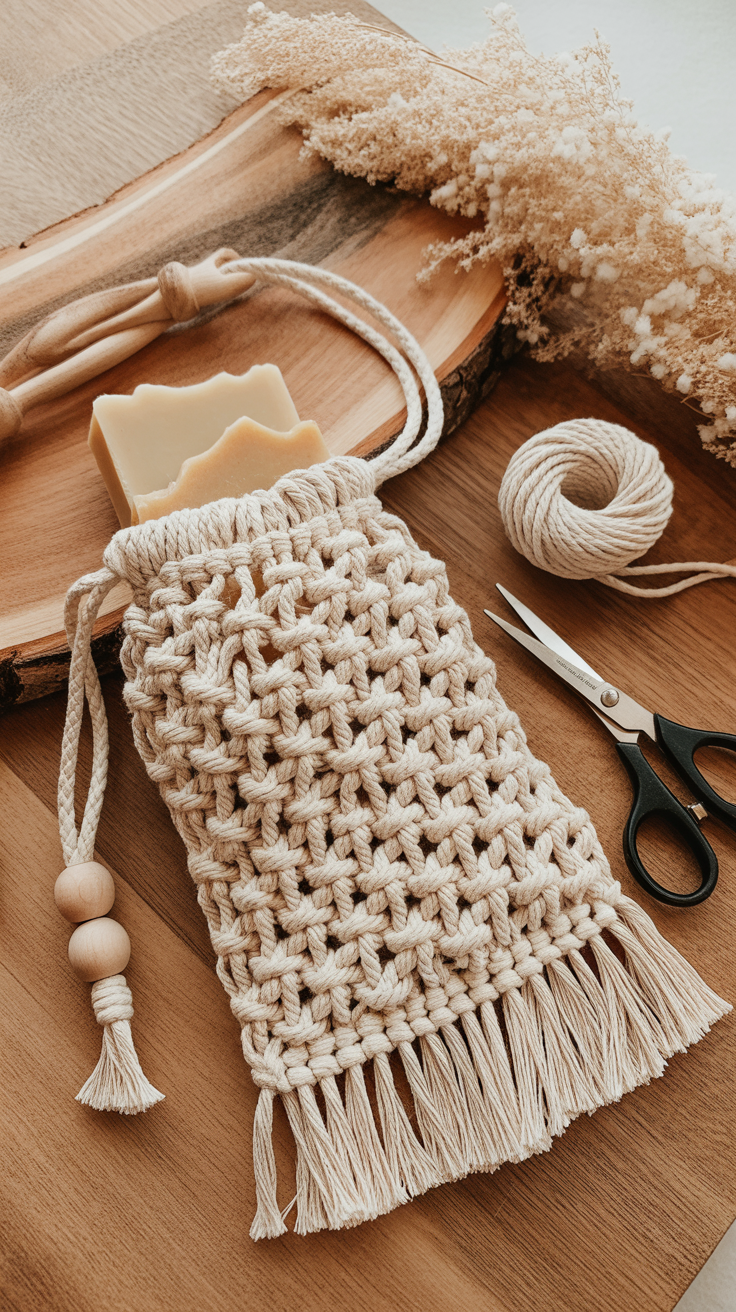
Okay, this one is chef’s kiss if you’re into that free-spirited aesthetic. We’re using natural cotton macramé cord in a creamy off-white shade to create these adorable little holders. The proportion sweet spot? About 5 inches wide and 6 inches tall—trust me on this. The texture is everything here: those chunky knots and the fringe at the bottom create such a tactile, handmade feel. Pair it with botanical soaps, and you’ve got yourself a gift that looks like it belongs at a fancy farmer’s market.
Shop the Look:
Dos & Don’ts:
- ✓ Do practice your knots on scrap cord first—it makes a huge difference
- ✗ Don’t use thin cord (under 3mm) or your holder will look flimsy
- ✓ Do leave at least 3 inches of fringe for that boho movement
- ✗ Don’t skip trimming your ends evenly—it cheapens the whole look
3. The Minimalist Muslin Pouch
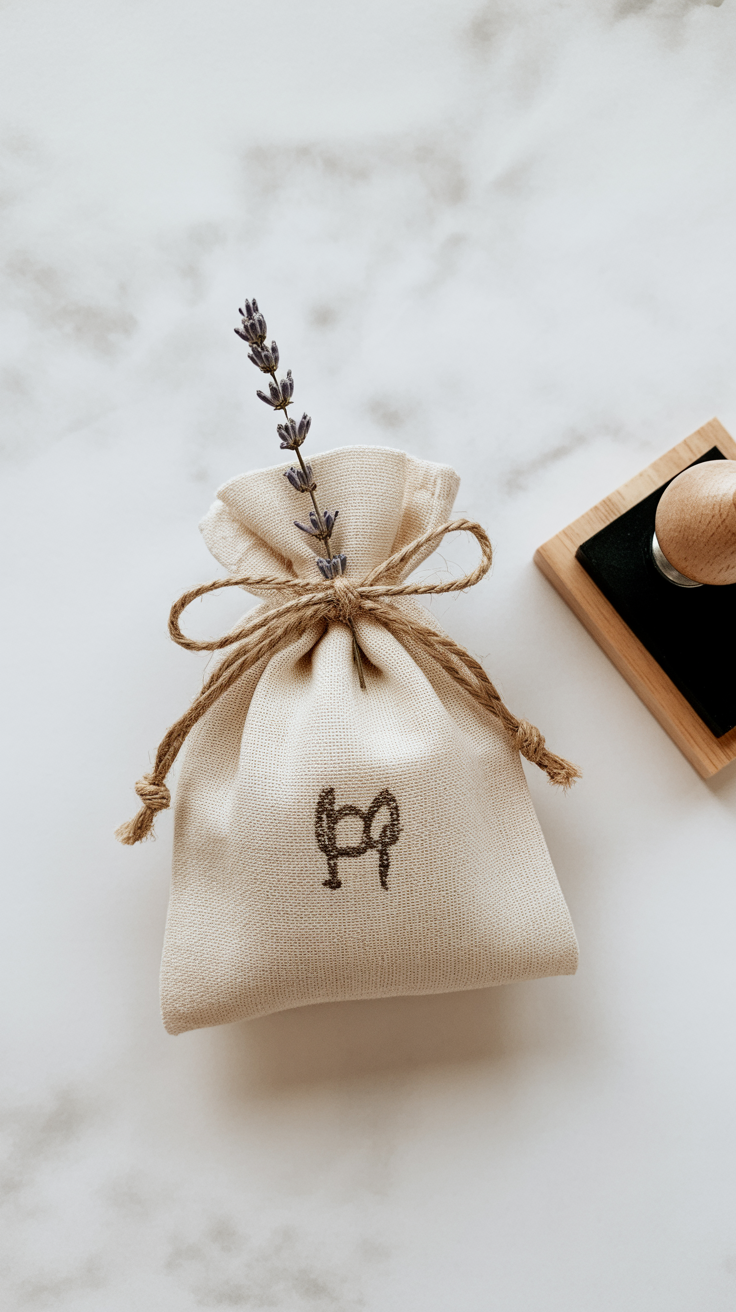
If you’re team “less is more,” this one’s calling your name. I’m obsessed with unbleached muslin in that gorgeous creamy-white shade—it’s got this subtle texture that photographs like a dream. The fabric weight should be light but not see-through (about 4-5 oz), and your proportions should be a simple 5×7 inch pouch. What makes this special is the simplicity: a clean fold, straight stitching, and maybe a single stamped monogram or tiny sprig of dried lavender tucked into the tie.
Shop the Look:
Dos & Don’ts:
- ✓ Do iron your muslin before assembling—crisp edges are everything
- ✗ Don’t overcomplicate with too many embellishments
- ✓ Do use contrasting thread for a subtle design detail
- ✗ Don’t use bright white muslin—the natural tone is what makes it special
4. The Vintage Floral Fabric Wrap
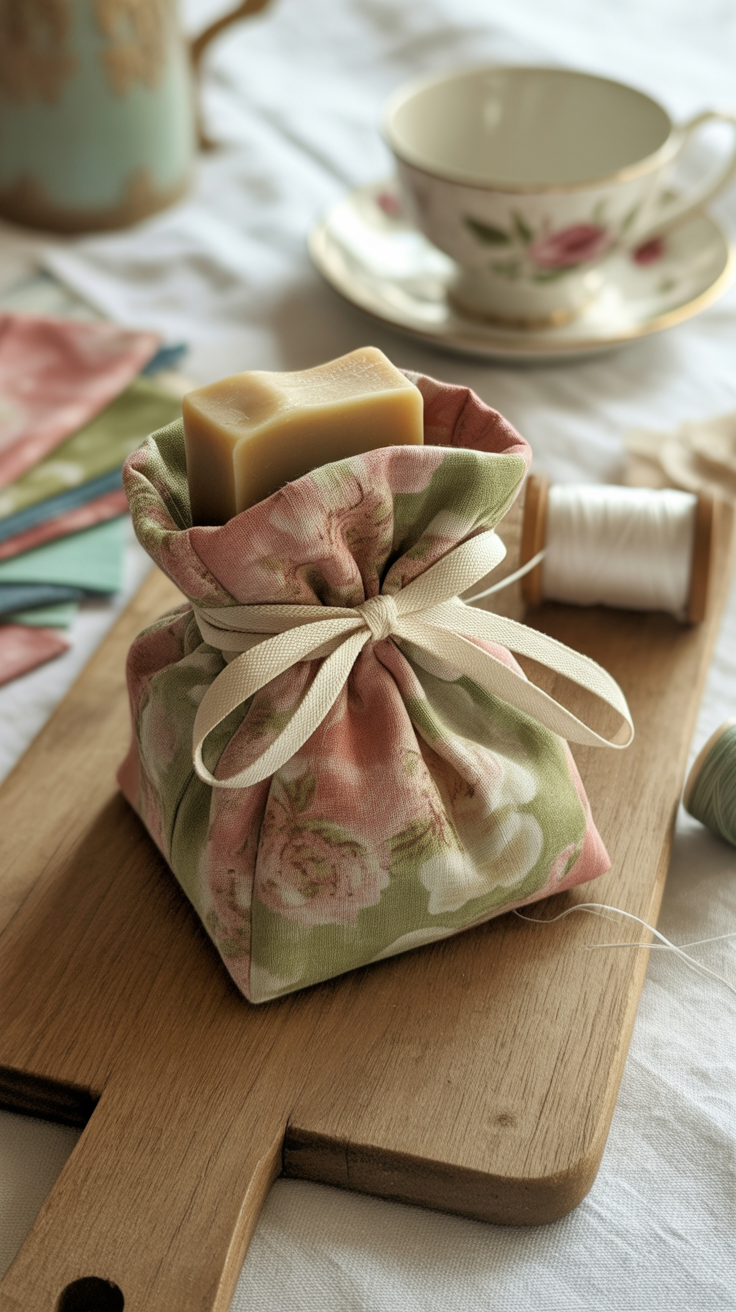
This is giving grandma-chic in the best possible way! Think vintage-inspired florals in muted dusty rose, sage green, or butter yellow on a cotton or cotton-linen blend. The fabric should have a slight drape but enough structure to hold a fold (medium weight, about 5-6 oz). Cut your fabric into 10×10 inch squares and use the Japanese furoshiki wrapping technique. The beauty is in those soft, rounded folds that frame the soap like a little present.
Shop the Look:
- Vintage floral cotton fabric
- Fabric ribbon
- Pinking shears
- Wax seal kit
Dos & Don’ts:
- ✓ Do choose florals with a vintage, muted color palette—not bright modern prints
- ✗ Don’t cut corners with wrinkled fabric—press everything first
- ✓ Do add a wax seal on your ribbon for that luxury boutique feel
- ✗ Don’t use synthetic satin ribbon—it looks cheap with vintage florals
5. The Mesh Produce Bag Style
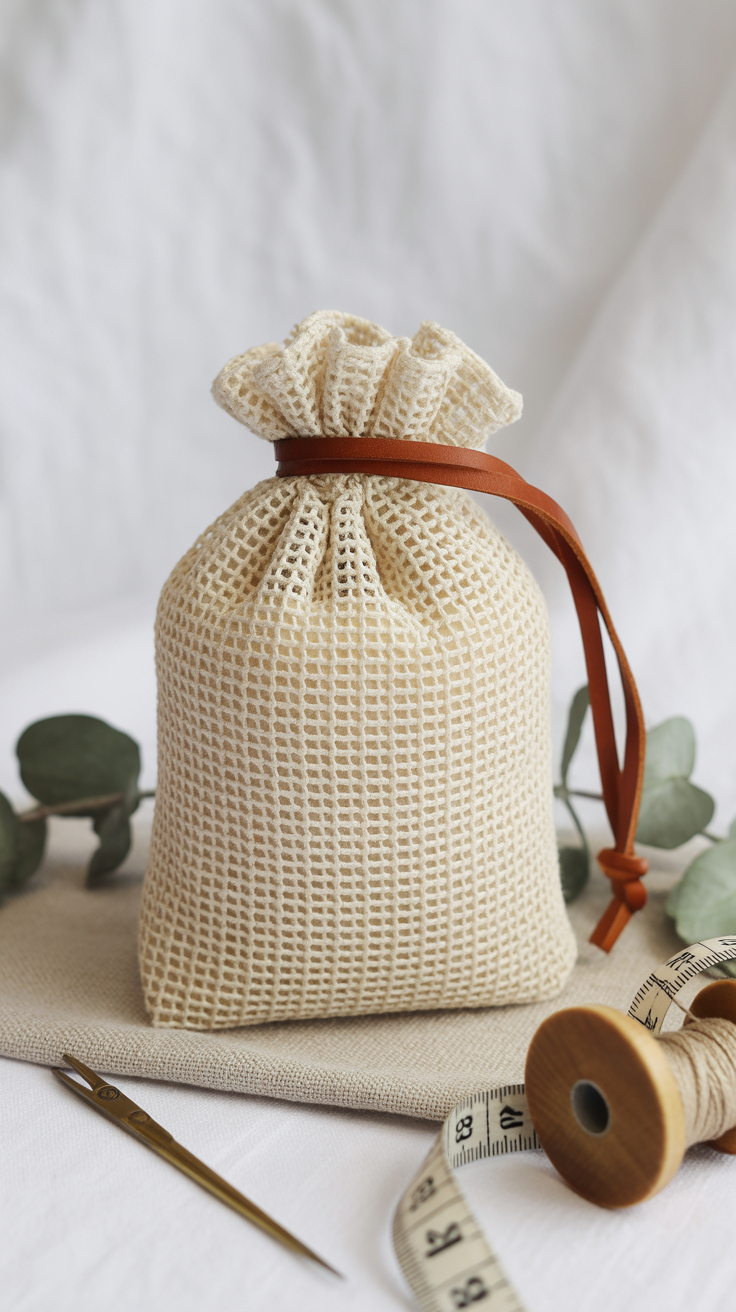
Can we talk about how having reusable mesh bags is not only gorgeous but also eco-conscious? I’m using organic cotton mesh in natural ivory or soft gray—the fabric has this beautiful open weave that lets you peek at the soap inside. The proportions are key: 6×9 inches gives you enough room to cinch it closed with a leather cord. The texture contrast between the smooth soap and that bumpy mesh is so satisfying, and it’s reusable, which your gift recipient will genuinely love.
Shop the Look:
- Organic cotton mesh fabric
- Leather cord
- Metal cord stops
- Sewing machine needles for mesh
Dos & Don’ts:
- ✓ Do use a ballpoint needle when sewing mesh to prevent snags
- ✗ Don’t make the mesh too tight—you want it to have give and flexibility
- ✓ Do double-stitch your seams for durability since mesh can stretch
- ✗ Don’t forget to seal your leather cord ends or they’ll fray
6. The Elegant Organza Overlay
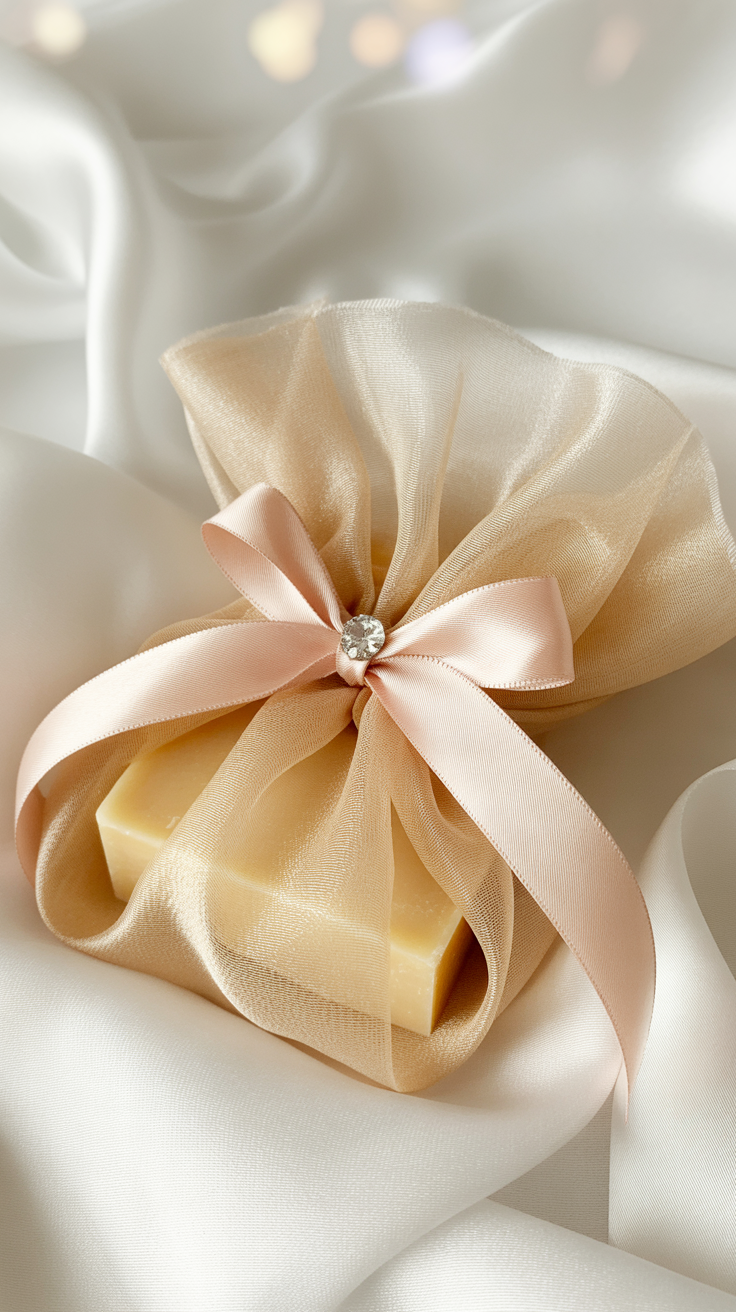
This is pure luxury, and honestly, it takes like five minutes to make. We’re using sheer organza in colors like champagne, blush pink, or silver gray layered over a solid cotton base. The organza should be that crisp, slightly stiff kind (not the soft tulle texture), and your proportions are 8×10 inches to create those beautiful gathered layers. When you cinch it with a silk ribbon, it creates this cloud-like effect that makes even a $5 bar of soap look like it costs $50.
Shop the Look:
- Organza fabric sheets
- Silk ribbon
- Rhinestone embellishments
- Gift tags
Dos & Don’ts:
- ✓ Do layer 2-3 sheets of organza for that dimensional, luxe look
- ✗ Don’t use polyester organza near heat—it can melt and look messy
- ✓ Do tie your ribbon in a classic bow, not a knot—it looks more refined
- ✗ Don’t skip the base layer or the soap will show through awkwardly
7. The Patchwork Scrap Fabric Bag
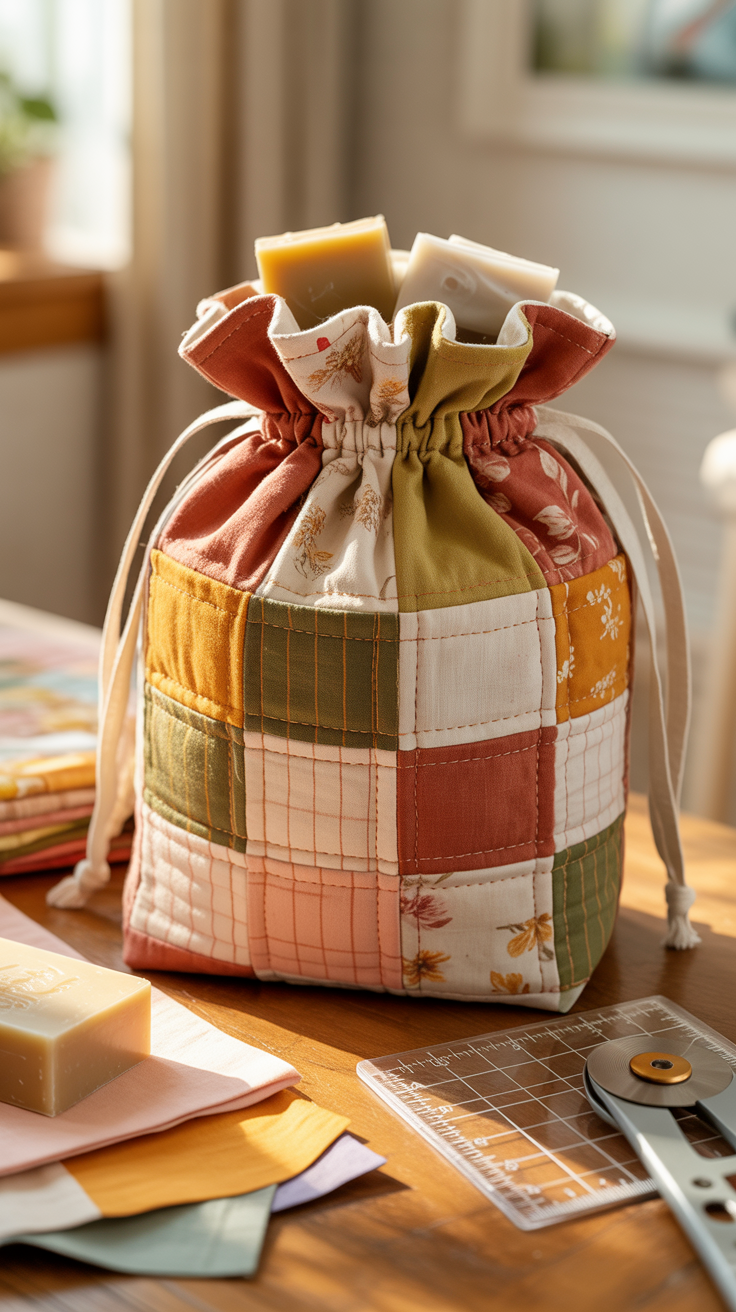
This is my sustainable queen moment! Raid your fabric scrap bin for cotton pieces in coordinating colors—I love a palette of terracotta, olive, and cream, or go monochromatic with different shades of blue. Each fabric piece should be roughly 2×2 to 3×3 inches, and your finished bag should be about 5×7 inches. The beauty is in the imperfection: mismatched textures (smooth cotton, waffle weave, even a bit of denim) create this artisan, one-of-a-kind vibe that screams “I put thought into this.”
Shop the Look:
- Cotton fabric bundle scraps
- Fusible interfacing
- Bias tape
- Button embellishments
Dos & Don’ts:
- ✓ Do use fusible interfacing to back your patchwork—it gives structure
- ✗ Don’t mix fabrics with drastically different weights—they’ll pucker
- ✓ Do embrace imperfect seams—they add to the handmade charm
- ✗ Don’t use more than 4-5 different patterns or it’ll look chaotic
There you have it, friends—seven absolutely stunning ways to package your soap gifts that’ll have everyone thinking you’re a professional gift wrapper! The best part? Most of these take under 30 minutes to make, and you probably have half the supplies in your craft stash already. Which style are you dying to try first? Drop a comment and let me know! And if you make any of these, please tag me—I live for seeing your creations!
Related Post: 3 DIY Woodland Gnome Christmas Ornaments
Affiliate Disclosure: This post contains affiliate links, which means I may earn a small commission if you click through and make a purchase. This comes at no additional cost to you and helps support this blog so I can keep creating content you love. I only recommend products I genuinely use and believe in. Thank you for your support!