
10 Kids Halloween Crafts Ideas That’ll Keep Your Little Goblins Busy
Halloween’s creeping up faster than a ghost in the night, and you know what that means – time to unleash your kids’ creativity! Ever find yourself scrambling for activities that don’t involve another candy-induced sugar rush? Trust me, I’ve been there. After years of Pinterest fails and glue-stick disasters, I’ve finally cracked the code on Halloween crafts that actually work.
These aren’t your typical “cut and paste” activities that leave you doing all the work. Nope! These 10 Halloween craft ideas will have your kids creating spooky masterpieces while you sip your coffee and pretend you’re not secretly having fun too 🙂
Paper Plate Pumpkin Faces
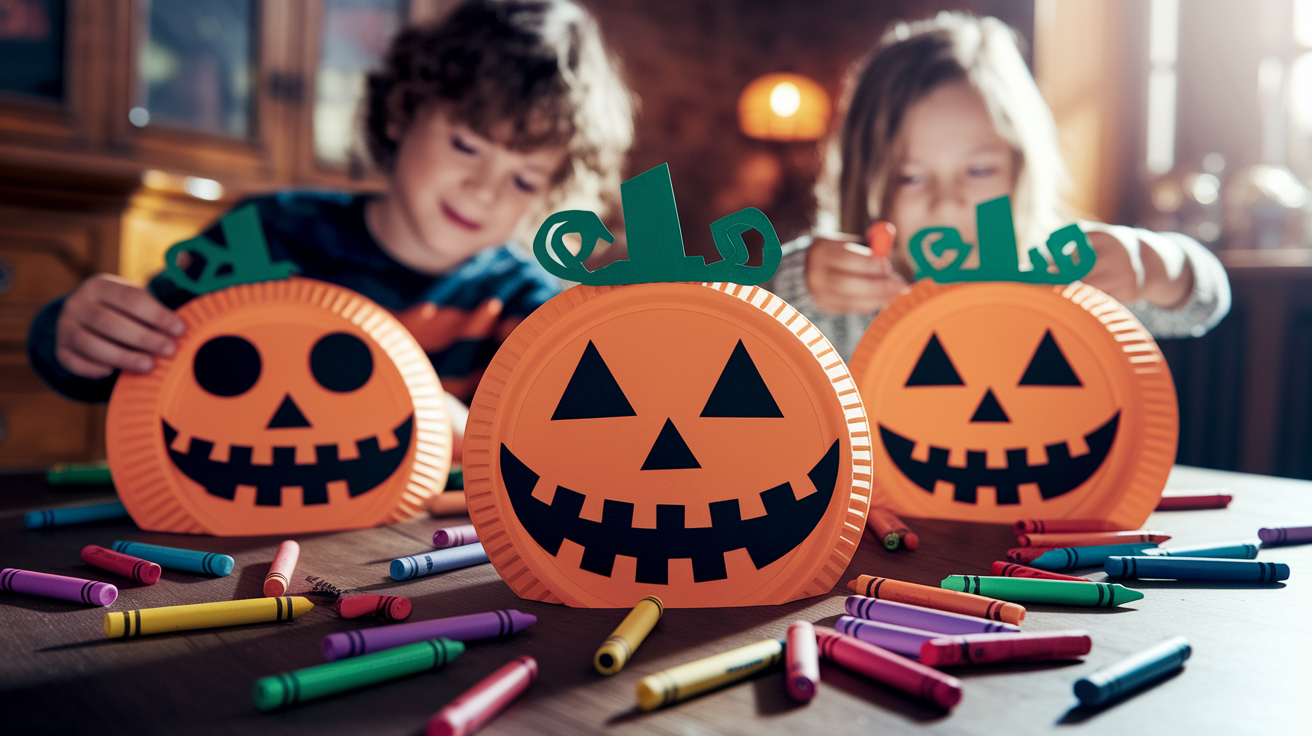
Let’s kick things off with something so simple, even your three-year-old can nail it (mostly).
Materials needed:
- Orange paper plates (or white ones + orange paint)
- Black construction paper
- Glue sticks
- Safety scissors
- Crayons or markers
- Green construction paper for stems
Pro tips for success: Start by having kids paint white plates orange if you couldn’t find colored ones – honestly, this adds an extra layer of fun. While they’re drying, cut out various triangle and square shapes from black paper for eyes, noses, and mouths. Let the kids mix and match different expressions. Some will go classic jack-o’-lantern, others will create wonky masterpieces that somehow look even better.
The beauty here? No two pumpkins look alike, and that’s exactly the point. I learned this the hard way when I tried to make my daughter’s “match the Pinterest photo.” Her lopsided grin version was way more charming than my perfect triangle attempts.
Ghostly Handprint Art
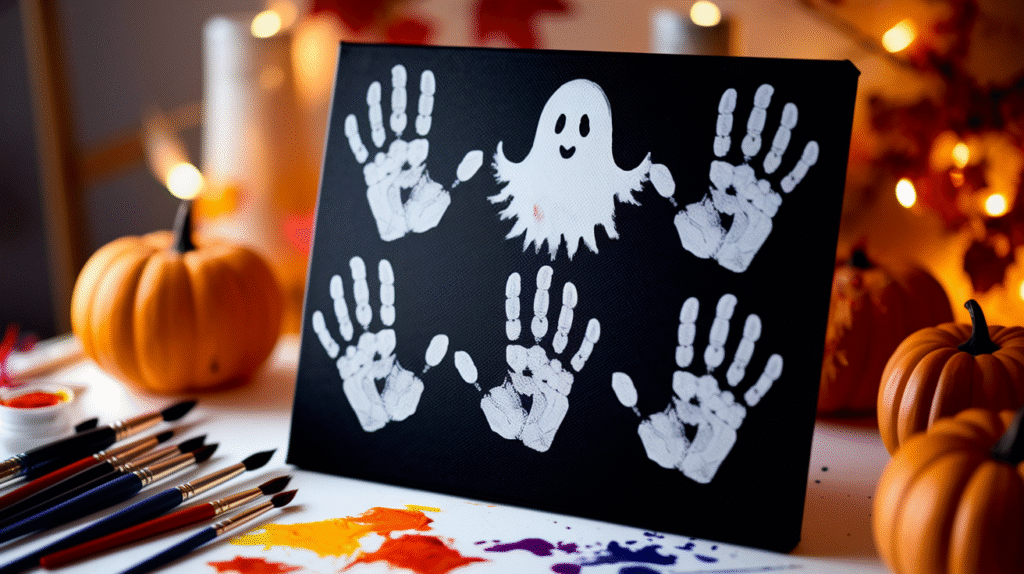
Nothing beats the classic handprint craft, but this Halloween twist makes it extra special.
Materials needed:
- White paint
- Black paint or markers
- Canvas or thick paper
- Paper towels
- Paintbrushes (fine-tip)
- Baby wipes for cleanup
Making it work: Paint your child’s hand with white paint and press it onto the canvas with fingers pointing down. Once dry, add two black dots for eyes and a small “o” for the mouth. Want to level up? Create a whole ghost family by doing multiple handprints in different sizes.
Here’s what I wish someone told me earlier – do the handprints first, clean up immediately, then come back for the face details once everything’s dry. Trust me on this one; wet paint and excited kids don’t mix well!
Toilet Paper Roll Monsters
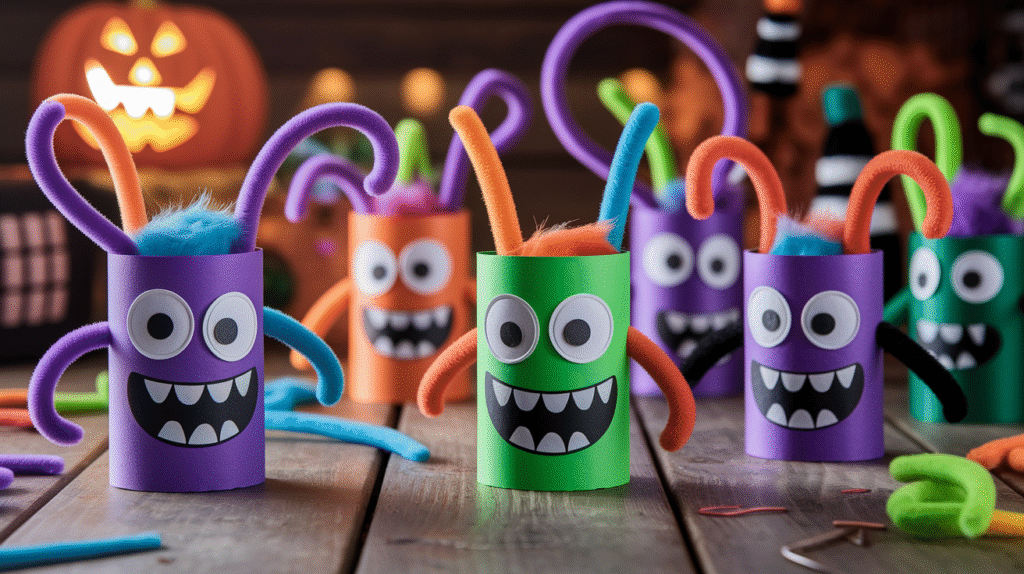
Before you toss those empty toilet paper rolls, hold up! These little tubes are about to become your new favorite craft supply.
Materials needed:
- Empty toilet paper rolls
- Acrylic paints (black, orange, purple, green)
- Googly eyes (various sizes)
- Pipe cleaners
- Glue gun (adult use only)
- Markers
- Construction paper scraps
Monster-making magic: Paint the rolls in spooky colors and let dry completely. While waiting, cut small triangles from construction paper for teeth or horns. Once dry, glue on googly eyes – and here’s where it gets fun – use different sized eyes for goofy personalities. Add pipe cleaner arms and legs, then draw on mouths and other details.
The wonkier, the better! My son’s three-eyed purple monster with uneven teeth became his favorite decoration. Sometimes imperfection creates the most character.
Spider Egg Carton Creations
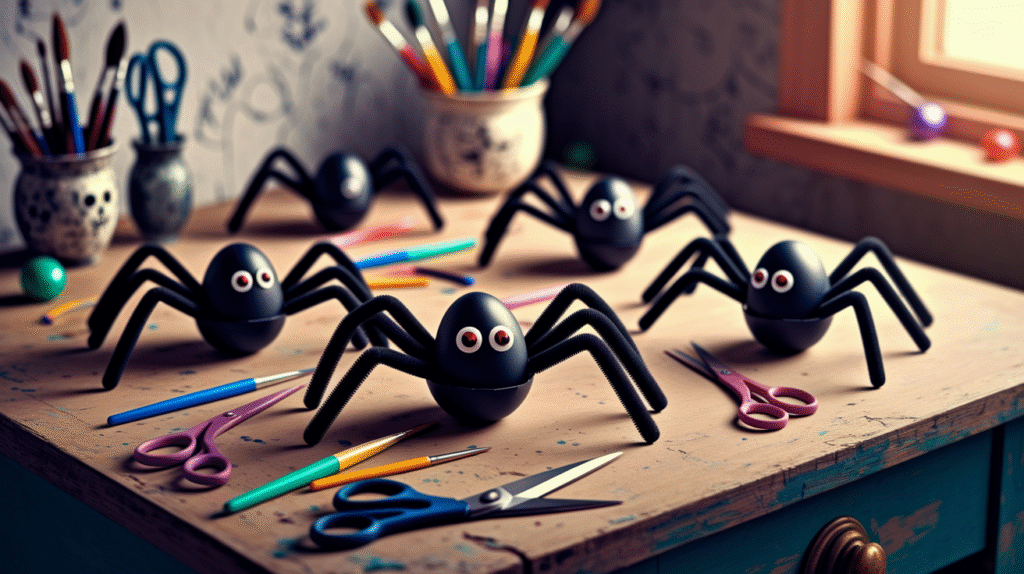
Got egg cartons lying around? Perfect! This craft turns trash into creepy-crawly treasures.
Materials needed:
- Cardboard egg cartons
- Black paint
- Pipe cleaners (black or brown)
- Red paint or markers
- Scissors
- Paintbrushes
Creepy crawly construction: Cut individual cups from the egg carton – each cup becomes one spider body. Paint them black and let dry. Poke four holes on each side of the cup and thread pipe cleaners through for legs. Bend the legs into realistic spider poses. Add tiny red dots for eyes, and voilà – instant arachnid army!
Pro tip: Make a whole spider family with different leg positions. Some crawling, some standing tall – it creates a more dynamic display that’ll make visitors do a double-take.
Leaf Ghost Garland
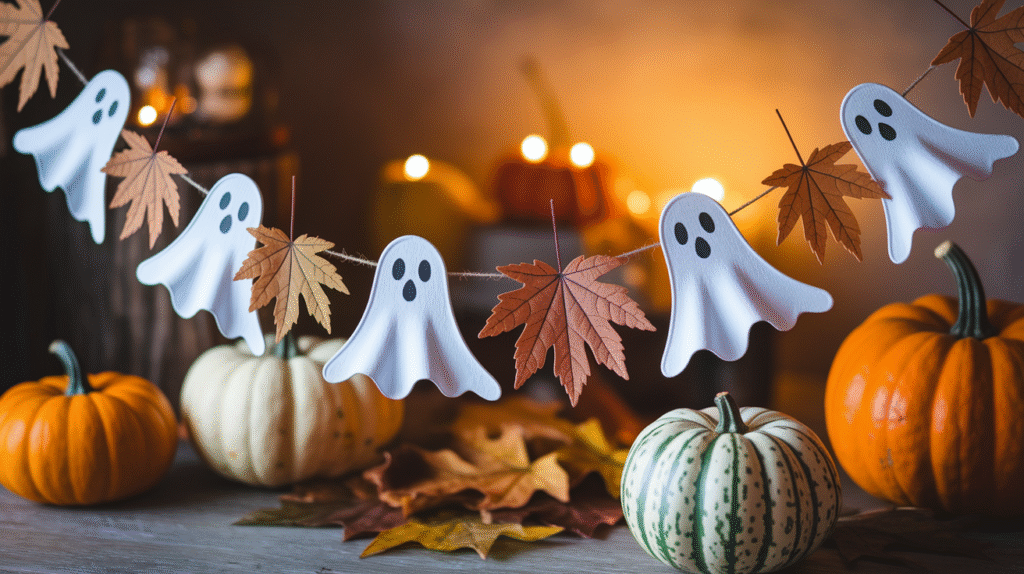
This one’s perfect for those beautiful fall leaves cluttering your yard. Why rake when you can craft, right?
Materials needed:
- Fresh fall leaves (various sizes)
- White spray paint
- Black permanent markers
- String or twine
- Hole punch
- Newspaper (for spray painting)
Spooky leaf transformation: Collect leaves in good condition – not too crispy or they’ll crumble. Lay them on newspaper outside and spray with white paint. Once dry, use black markers to add ghost faces. Each leaf’s natural shape creates a unique ghost personality. Punch holes at the top and string them together for a garland that’s both seasonal and spooky.
The irregular shapes make these ghosts way more interesting than perfect circles. Mother Nature’s already done the hard work – you’re just adding the finishing touches!
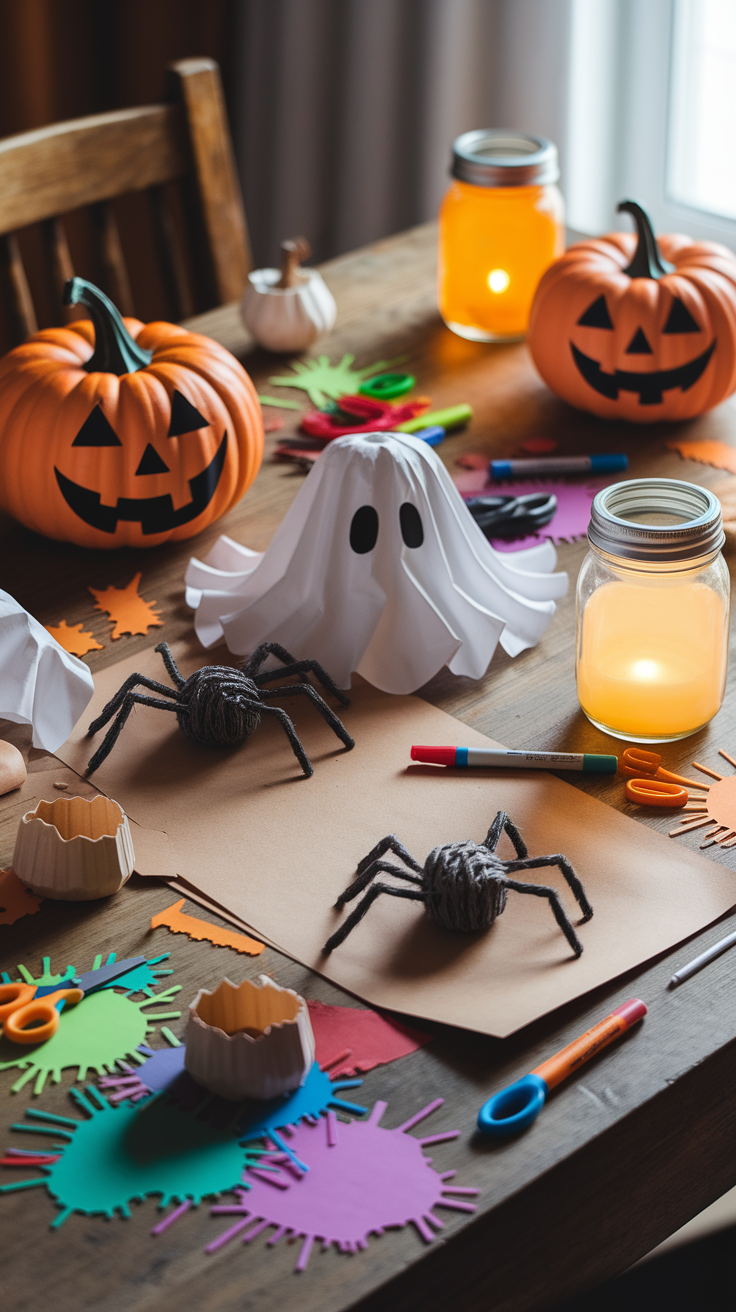
Mason Jar Luminaries
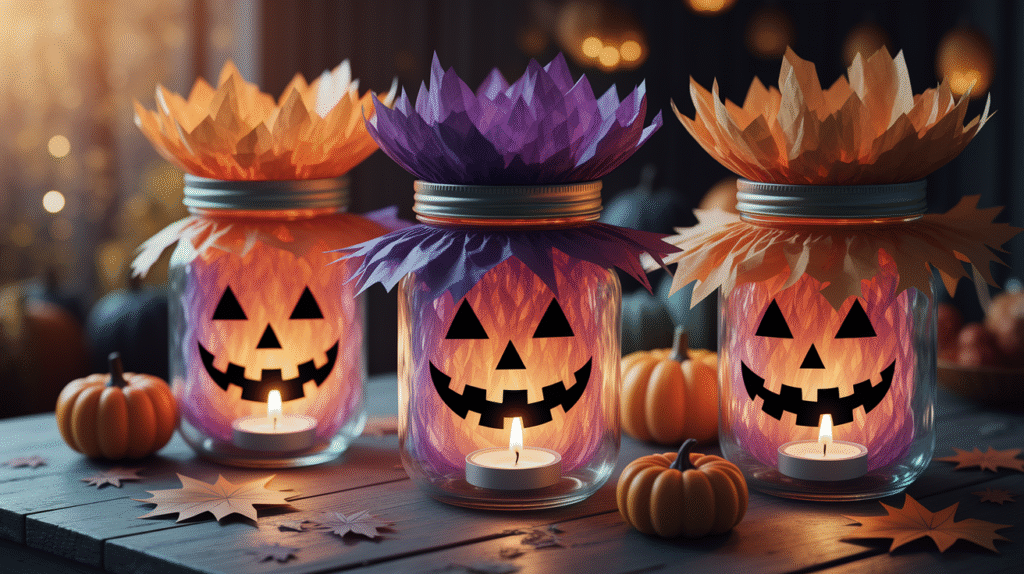
Want something that actually serves a purpose beyond looking cute? These luminaries nail both form and function.
Materials needed:
- Mason jars (various sizes)
- Orange and purple tissue paper
- Mod Podge or white glue
- Battery-operated tea lights
- Foam brushes
- Black permanent markers
- Scissors
Glowing goodness: Tear tissue paper into irregular pieces – don’t cut them; torn edges look more organic. Brush Mod Podge onto the jar and layer tissue paper pieces, overlapping them. Once completely dry, draw jack-o’-lantern faces with black marker. Drop in battery tea lights for safe, spooky lighting.
FYI, these work way better than real candles with kids around. Plus, you can reuse them year after year by just changing the tissue paper colors for different holidays.
Pipe Cleaner Bats
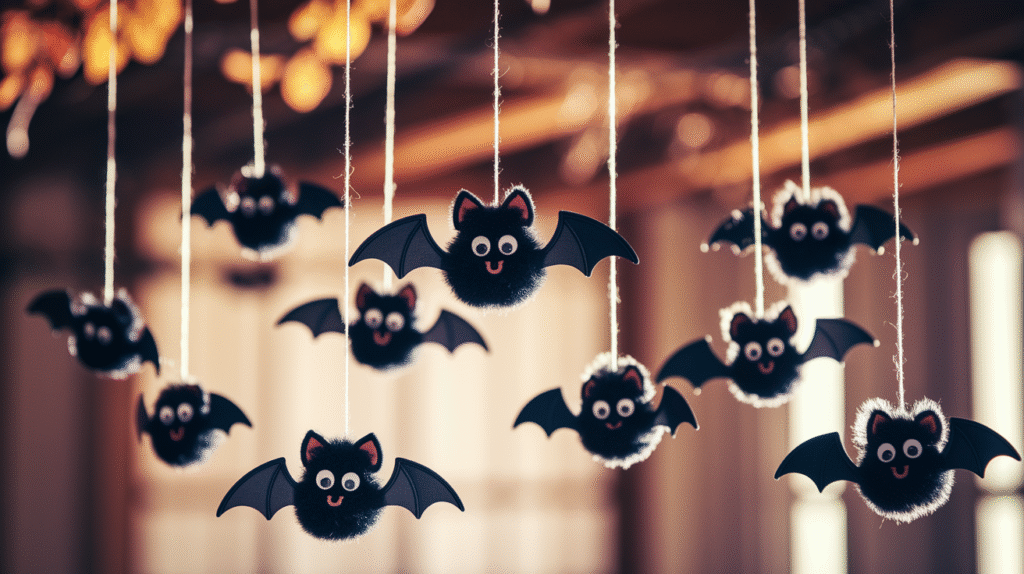
Sometimes the simplest crafts pack the biggest punch. These little bats prove that point perfectly.
Materials needed:
- Black pipe cleaners
- Small black pom-poms
- Googly eyes (tiny ones)
- Hot glue gun (adult supervision required)
- Wire cutters or strong scissors
Bat assembly: Take one pipe cleaner and fold it into a “W” shape for wings. Twist another pipe cleaner around the center to create the body, leaving extra length for hanging. Glue a pom-pom to the top for the head and add tiny googly eyes. The imperfect wing shapes actually make them look more realistic – real bats aren’t perfectly symmetrical either!
Hang these from the ceiling at different heights for a flying effect that’ll have trick-or-treaters looking up in surprise.
Construction Paper Witch Hats
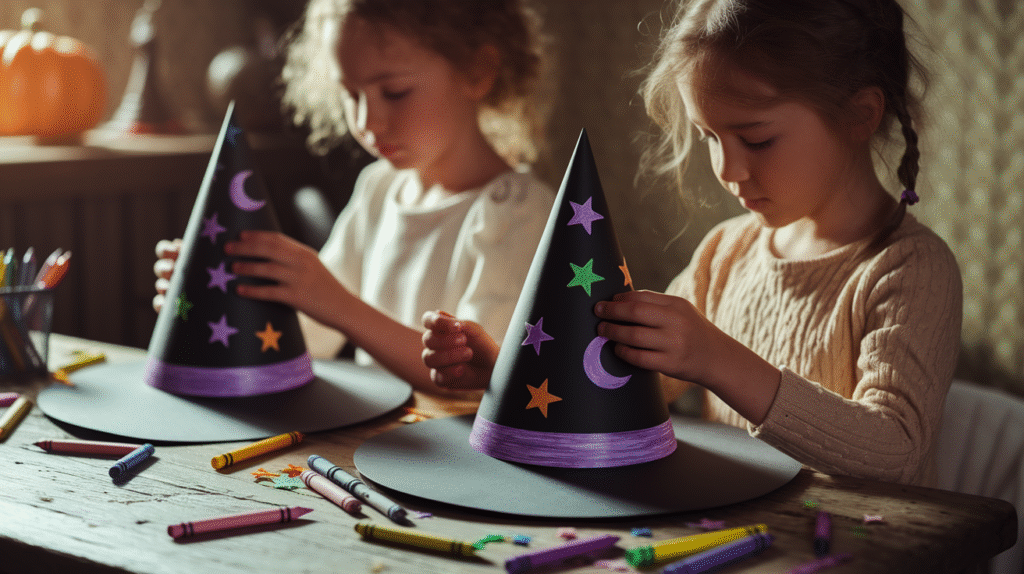
Every Halloween needs a good witch hat, but store-bought ones never fit quite right. Time to make your own!
Materials needed:
- Black construction paper
- Stapler or tape
- Scissors
- Colored paper scraps
- Glue sticks
- Ribbon or elastic (optional)
- Crayons or markers
Witchy hat wisdom: Cut a large semi-circle from black paper – bigger than you think you need. Roll into a cone shape and staple. Trace the bottom opening onto more black paper, cut it out slightly larger, then cut tabs around the edge. Fold tabs up and attach to cone for the brim.
Here’s the fun part – let kids decorate with paper shapes, stars, moons, or whatever strikes their fancy. Some traditions are meant to be broken, and neon pink stars on witch hats? Why not!
Popsicle Stick Skeletons
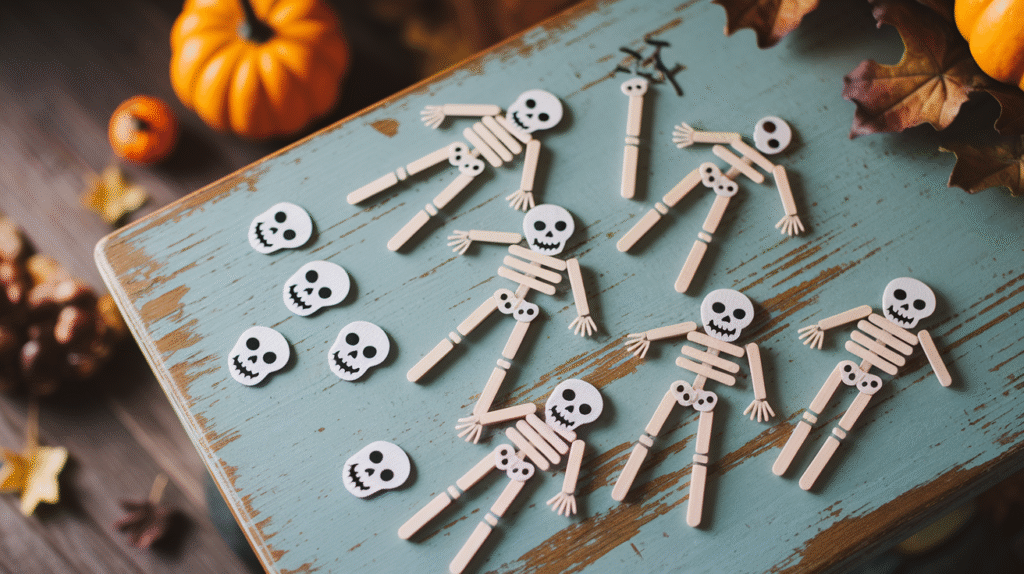
This craft combines engineering with spookiness – what’s not to love?
Materials needed:
- Popsicle sticks (lots of them)
- White paint
- Black markers
- Glue (craft glue or hot glue gun)
- Small brads or paper fasteners (optional for movement)
Bone construction: Paint popsicle sticks white and let dry. While waiting, plan your skeleton layout – one stick for spine, shorter pieces for ribs, arms, and legs. Glue pieces together, creating joints where bones would naturally bend. Use black marker to add bone details and a skull face on the top piece.
Want to get fancy? Use brads at joints so arms and legs can move. My kids spent hours posing their skeletons in different positions – apparently, skeleton dance parties are a thing!
Corn Husk Dolls with a Halloween Twist

This traditional craft gets a spooky makeover that’s surprisingly engaging for modern kids.
Materials needed:
- Dried corn husks (available at craft stores)
- String or twine
- Fabric scraps
- Markers
- Small pieces of felt
- Scissors
- Bowl of warm water
Spooky doll creation: Soak corn husks in warm water for 10 minutes to make them pliable. Bundle several husks together and tie near the top for a head. Separate some husks for arms, tie at wrists, then insert through the body bundle. Tie at waist. For Halloween flair, use black fabric scraps for witch robes or orange for pumpkin-themed dolls.
The rustic, handmade look of these dolls fits perfectly with Halloween’s harvest season vibes. Plus, they’re sturdy enough to survive enthusiastic play sessions.
Final Thoughts: Crafting Memories That Last
Look, I’m not going to lie and say every craft will go perfectly. There will be glue everywhere, paint on clothes (despite your best efforts), and at least one meltdown over scissors sharing. But here’s the thing – those messy moments often become the best memories.
These Halloween crafts aren’t just about keeping kids busy; they’re about creating traditions, sparking creativity, and maybe discovering that you actually enjoy getting a little crafty yourself. Whether you tackle one project or brave all ten, your kids will remember the time you spent creating together long after the candy’s gone.
So grab those supplies, embrace the chaos, and get ready to make this Halloween a little more handmade and a lot more fun. After all, store-bought decorations are nice, but nothing beats the pride on a kid’s face when they show off something they made with their own hands 🙂
IMO, the best part isn’t even the finished products – it’s watching your little ones’ faces light up when their vision comes to life, one googly eye and pipe cleaner at a time.